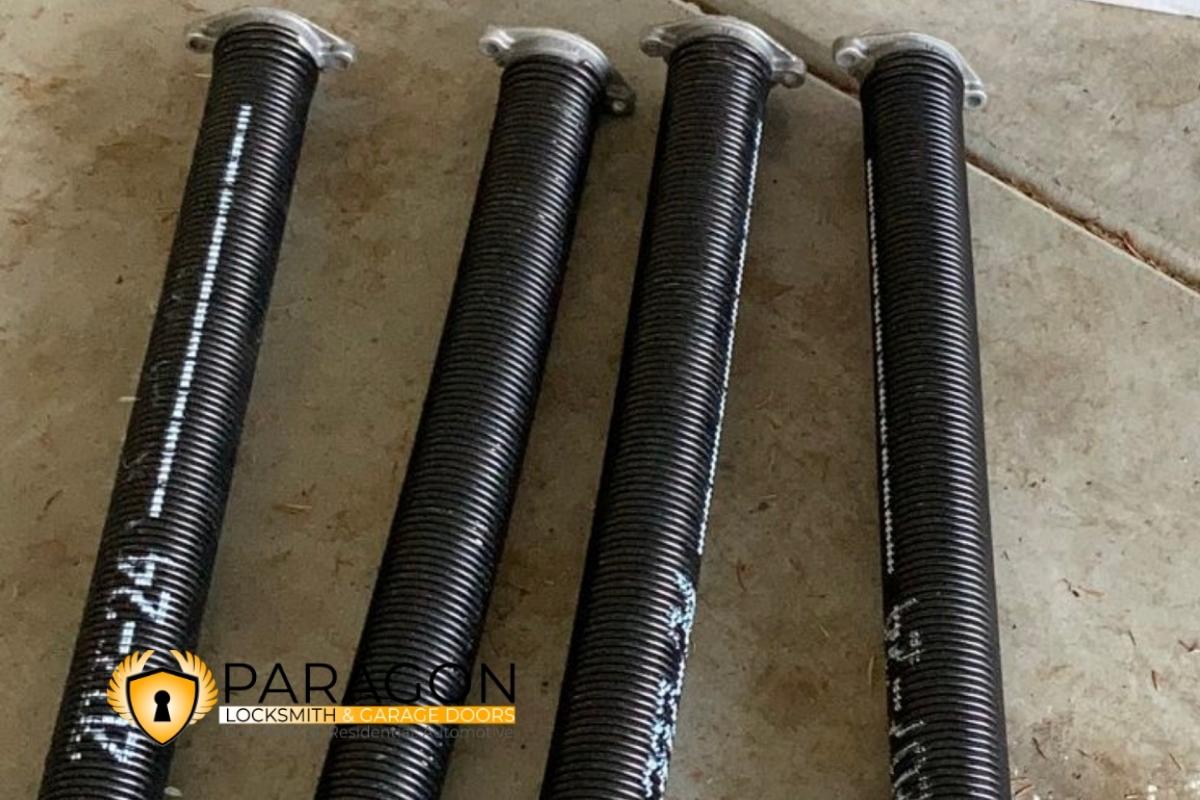
The garage door torsion spring is the most essential part of the whole garage door panel. It allows the door to open and shut smoothly whether it is manual or automatic.
The function of a torsion spring is to store energy, tighten when the door is closed, and unroll when it is about to open. However, these springs installed in the panel have a limited life span due to the continuous work. By the time the spring loses its efficiency and needs to replace as soon as possible. Else it could be a serious threat to your life and property.
Few homeowners decide to install a single torsion spring on the garage door by themselves but many of them Call Professional Help to do the job since working with springs could be very dangerous. Nonetheless, the work can be handled by a moderate or expert DIYer on his own.
If you opted to install a garage door torsion spring on your own, you must know how to install good quality springs because the job you are doing is not easy. In the whole process, the quality of the spring must not be compromised.
Guide To Install A Single Torsion Spring Assembly
Guide To Install A Single Torsion Spring Assembly
| TOOLS | MATERIAL |
|---|---|
| Stepladder | |
| Safety Goggles | Brand New Pair of Torsion Springs |
| 2 C-clamps | Winding Bars |
| Working Gloves | Garage Door Spray |
| Locking Pliers | New Cables |
| Open-end or Adjustable Wrenches |
PRO-TIP: Before you start working, carefully understand that there will be many parts that need to be disconnected and reattached when the garage door torsion spring is replaced. Before deactivating the spring, it is better to understand that how does it work. Make sure to take some pictures.
STEP 1: SUPPORT THE PANEL
With the help of C-Clamps, lock the door in a closed position parallel to the lowest wheel on the door track. At this point, the door opener should be disconnected.
Now place the stepladder slightly off the side to properly align with the winding cones. Check the size of the winding bars that best fit the torsion spring.
STEP 2: TAKE OFF THE SPRINGS
To open the winding cone, insert the winding bar into the bottom fitting of it. Hold the bar tightly when you loosen the screws of the winding cone. Make sure to fully grip the cone as the setscrew supports the bar and when it loosens it releases a good amount of force.
Gradually spread out the springs until there is no force remain in the winding bar. Take it off until the spring tension is fully released.
STEP 3: DISCONNECT THE TORSION SPRING AND CABLES
Using an adjustable wrench, disconnect the torsion springs from the center bracket by opening them. Now gradually slide the springs down the torsion bar towards the end.
With the help of locking pliers, hold the torsion bar to prevent it from falling as you go down to unplug the cables.
Remove the lift cables from the brackets, now detach the setscrews holding the cable drums at the end of the bar. Take out the cable drum from the end of the torsion bar and slide the old springs off. Check the cables if they need to be changed at this stage.
STEP 4: INSTALL NEW SPRINGS
Pass the new spring into the torsion bar making sure the springs are on the correct sides. Lock the moving mounting cones of the springs into the bracket in the same place where the old ones were attached.
STEP 5: REATTACH THE LIFT CABLES
Reattach the lift cables to the brackets. By the end of the torsion bar, slide the cable drums and make sure the cables are properly tied up inside the drums. There should be no hap in the cables, then secure them by fully tightening the set screws against the torsion bar.
STEP 6: ADJUST THE SPRINGS
This is the technical part of the process where you have to see in the manufacturer instructions, i.e., the number of twists needed to load the winding cone and torsion spring. Generally, it needs 30 to 36 quarter twists to fully tighten the spring. Also, the twists should be done in an upward direction.
STEP 7: SUPPORT THE SPRINGS
Once the springs are correctly placed, tap with the hammer to extend the spring. While holding the winding cone tightens the screws carefully to secure the cones of the torsion bar.
STEP 8: INSTALLATION DONE
Now that the garage door torsion springs are installed, apply spray lubricant on the springs. Remove all the clamps and plugs and Test Run the door several times to see if it is properly working.
Bottom Line
Seek professional help if the door is not closing or opening properly after the installation of a new torsion spring on the garage door.


Leave A Comment